Serebyte
Home | Tutorials | Portfolio
In this tutorial we will look at drawing a rectangle to our render buffer.
Before we get into the theory of drawing a rectangle to the screen. We will first separate our code into three files: main.h, render.c and main.c.
main.h will contain our file includes, our structure definitions, our global variable declarations and our function declarations. We will include main.h at the top of our main.c file.
render.c will contain our render() function as well as all of the code used to draw shapes and sprites now and later on. We will include render.c directly into main.c after we include main.h,so that we can use our global variables in render.c.
main.c will continue to contain all of our code for creating our window and render buffer and for handling events.
Before we can draw anything, note that the bottom left corner of the render buffer is the point (0,0). This is unlike the window itself, where the top left is (0,0). Therefore, when drawing shapes to the screen, we should treat the bottom left as (0, 0). Rightwards is the positive x-direction, upwards is the positive y-direction.
Now we need to create a drawRectangle function. This should not return a value (i.e. be a void function). It should take seven parameters. The first two should be the x and then y coordinates of the bottom left corner. The third and fourth to should be the x and then y coordinates of the top right corner. The fifth, sixth and seventh are the red, green and blue values of the colour of the rectangle (which should be unsigned 8-bit integer).
We need to declare our drawRectangle function. This should be done in the main.h file, with the other function declarations. We can do this with the line: "void drawRectangle(int startX, int startY, int endX, int endY, uint8_t red, uint8_t green, uint8_t blue);".
Now we need to define our drawRectangle function. We should do this in the render.c file. The first thing to do inside of our drawRectangle function is to create a pixel pointer with the line "Pixel * pixel;". This pointer will always point to the pixel we are going to modify. Next we will create two loop counters, i and j. When drawing our rectangle, we want to iterate through each row, and then iterate through all of the pixels in each row and draw them.
Next, we want to start a loop for each for of the rectangle. We can do this with the line: "for(i = startY; i < endY; i++){". The first line in this loop should set our pixel pointer to the start of the row. We want to render to row i of the render buffer. We can start at renderBuffer.pixels (the start of the buffer), and add on i * BUFFER_WIDTH to get to the start of row. After this, we should add on startX, so that our pixel pointer points to the leftmost side of the rectangle on this row. We can do this with the line: "pixel = renderBuffer.pixels + i * BUFFER_WIDTH + startX;".
After setting our pixel pointer, we want to loop through the width of the rectangle and draw to it. We should first start a loop, using the line "for(j = startX; j <= endX; j++){". Inside this loop, we want to check if the pixel at coordinates (j, i) is actually within the bounds of the buffer, as attempting to draw to a pixel outside of the buffer will usually cause a crash. We can check that our pixel is on screen using the line "if(i >= 0 && i < BUFFER_HEIGHT && j >= 0 && j < BUFFER_WIDTH){".
If our pixel is on screen, we want to draw it. We can do this by setting the colours of the pixel that our pixel pointer is currently pointing to. We should set them to the red, green and blue values we passed in as parameters. We can do this with the lines: "pixel->red = red;", "pixel->blue = blue;" and "pixel->green = green;". Outside of the if-statement that checks if our pixel is on screen, we want to increment our pixel pointer to the next pixel with the line "Pixel++".
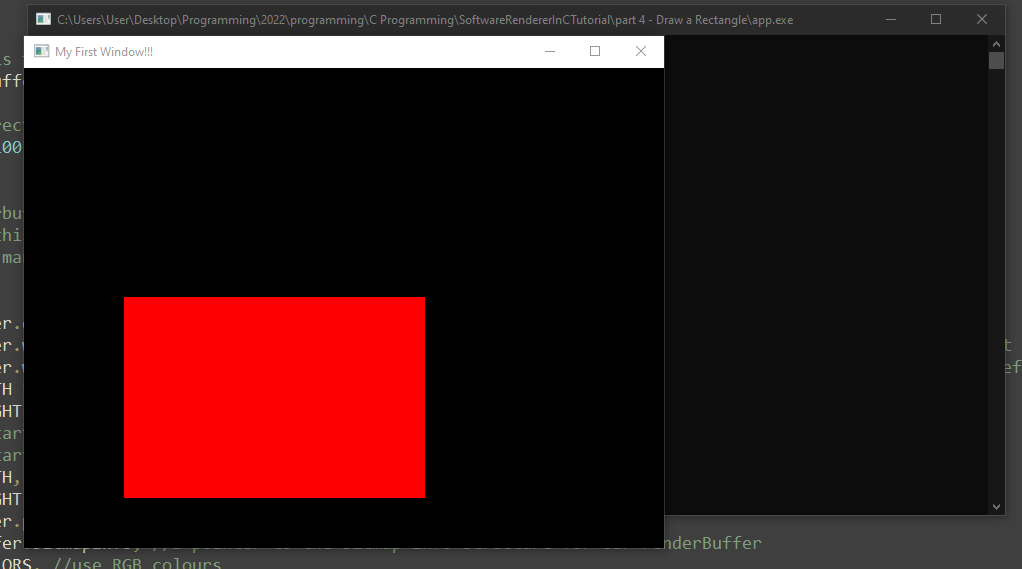
Now our drawRectangle function is complete. We should run this function inside our render function, and draw a rectangle. I will do this with the line: "drawRectangle(100, 50, 400, 250, 255, 0, 0);", but you can pass in whatever arguments you would like. Note that this line must be inserted after our screen-clearing memset call, and before our StretchDIBits call.
That's it for the theory of this tutorial. As usual, the code for each of our files is shown below.
Here is the code needed to draw a rectangle. If you are using MinGW, you can compile it with the command "gcc main.c -lgdi32 -o app". You should be able to use any Windows compiler - just be sure to link the gdi32 library.
main.h
render.c
main.c
If we run our program, we should see a rectangle appear in the colour we chose and the coordinates we plotted, similar to the image below:

That's all for this tutorial. In the next tutorial, we will look at drawing lines to the screen.